Greetings all.
It has been a while since I built a copter for myself.
The RcMumbai competition could not come at a better time as I had all the parts ready for a 250 which I was gonna build in December.
I had enough parts for two copters, but I'm afraid that I can only build one in time for Game Changers.
This one uses mostly old parts I salvaged from my completely 3D printed ZMR I built a while ago.
I decided to not go for a standard ZMR, and instead cut down the chassis to make it smaller/lighter and go for an X arrangement for consistent control on all axes.
The build was inspired from
http://www.hacksmods.com/2015/10/zmr-x-custom-zmr-build/This was also a build where I fully took advantage of my 3D Printer.
This is my meticulous build log with pictures of all the steps.
Parts used and source -1.
ZMR250 Carbon Fiber Chassis - Quadkopters
2.
Flip32+ Flight Controller - Banggood
(Salvaged)3.
DYS BE1806 2300kv - Banggood
(Salvaged)4.
Sunrise Slim 20A ESCs - Banggood
(Salvaged)5.
Gemfan and KingKong 5040 Propellers - Hobbyking
6.
Tattu 4S 1300/1800mah 45C Batteries - RcMumbai
7.
Mini Power Distribution Board w/ 5V and 12V Regulator - Quadkopters
8.
Frsky D4R-II Receiver - Hobbyking
9.
Sony 480TVL FPV Camera - RcIndia Classifieds
Waiting for a new one10.
TS5823 200mW 5.8G Transmitter - RcIndia Classifieds
11.
MinimOSD - Banggood
12.
WS2812 LED Bar - Quadkopters
First things first, it was time to cut down the frame. This is what came with the original frame.

GC - ZMRX (Cut down ZMR250)
Gloves, a handkerchief to cover your nose, a hacksaw and a file. Plus an open space like the roof and a few hours later, this is the result.

GC - ZMRX (Cut down ZMR250)
A close look at the cut plates.

GC - ZMRX (Cut down ZMR250)
The next step was to dry fit the frame to see how it would look.

GC - ZMRX (Cut down ZMR250)

GC - ZMRX (Cut down ZMR250)
Installed the motors.

GC - ZMRX (Cut down ZMR250)
ESCs installed and motor wires trimmed.

GC - ZMRX (Cut down ZMR250)
The Flight Controller and the PDB will be stacked one top of the other using nylon standoffs. I dry fitted them to trim the ESC servo wires to length.

GC - ZMRX (Cut down ZMR250)
Okay, so this is the fun part, I wanted to do something cool with the ESCs, I ended up insulating them with thin red tape, and then covering them up with wire mesh. Really like the end result.

GC - ZMRX (Cut down ZMR250)
Also trimmed and soldered the ESC power wires to the PDB.
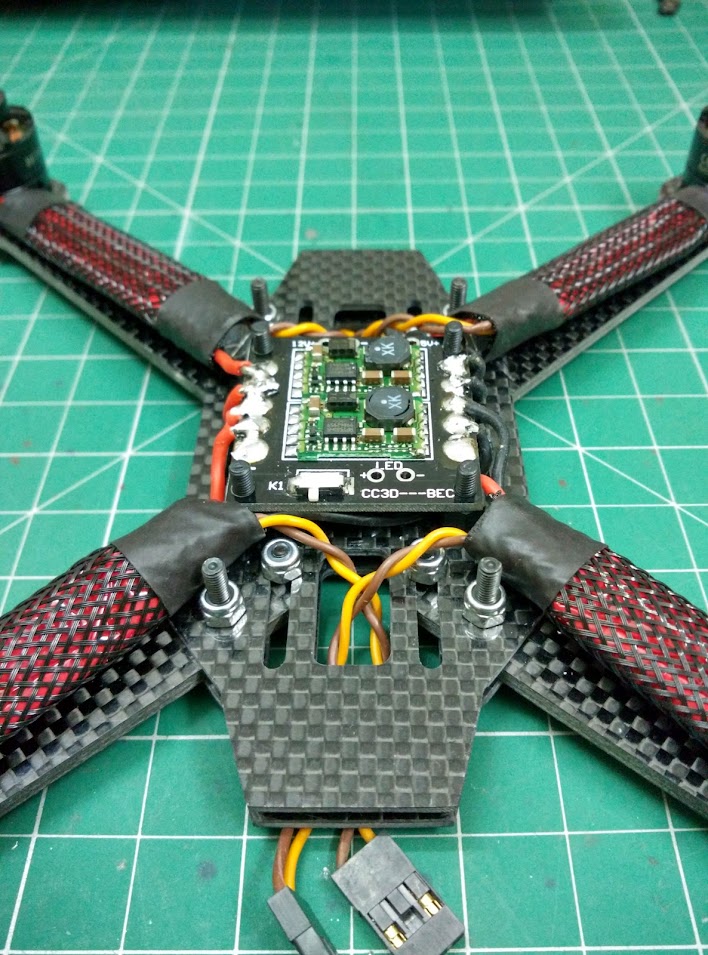
GC - ZMRX (Cut down ZMR250)
Next I set the MinimOSD up.
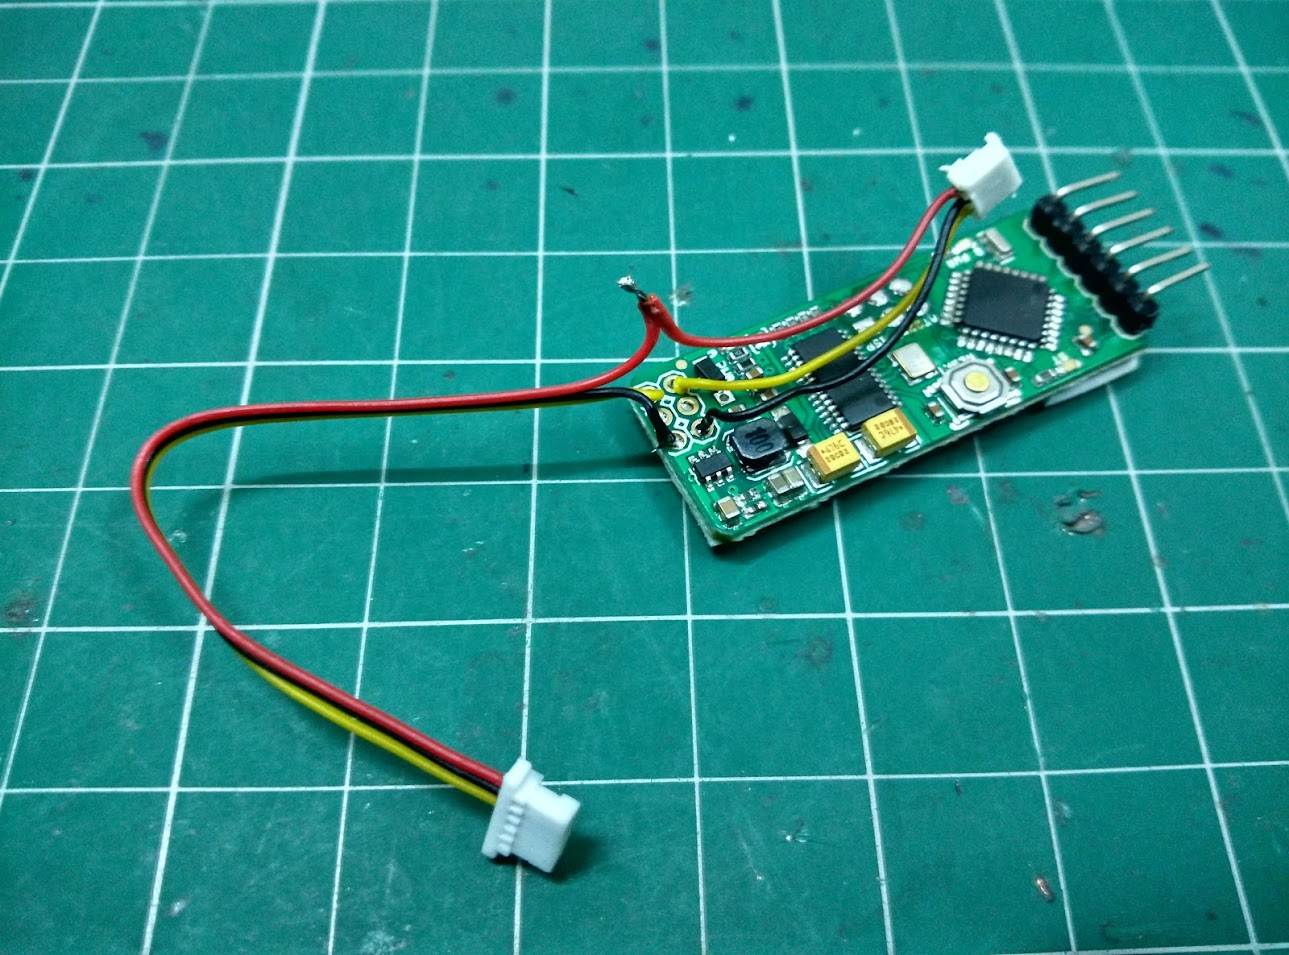
GC - ZMRX (Cut down ZMR250)
Problem was, I didn't have a FTDI cable at the moment, so couldn't program the OSD. That meant I would have to either delay the build, or install the OSD in a way that the FTDI pins would be accessible even after the build is complete for easy programming. I found the perfect place to mount it.

GC - ZMRX (Cut down ZMR250)

GC - ZMRX (Cut down ZMR250)
The vtx connector is at the back, the camera connector is at the front. Also, the minim is almost hidden under the PDB. Perfect.
At this point I realised a few things.
I need to way to mount the vtx and the frsky antennas - a 3D printable part was provided in the blog which was perfect.
Second, I wanted a way to mount my camera, and also wanted it at an angle. Thought of a mount, loaded Sketchup, designed it and printed it. Came out perfect.
Third, I wanted a way to mount the LEDs, again, thought of a simple mount, designed it and printed it. Perfect again.

GC - ZMRX (Cut down ZMR250)
Mounted the LEDs, they look great!

GC - ZMRX (Cut down ZMR250)
Time for the XT60. I didn't want it hanging with a cable, I again designed and printed a small part which will hold the XT60 snug, vertically on the top plate (you will see it at the end).

GC - ZMRX (Cut down ZMR250)
I soldered the wires to the XT60. I couldn't find proper gauge wires so just installed two wires each. It was probably overkill, but meh!
This is my own trick I use to solder connectors without using a helping hand.

GC - ZMRX (Cut down ZMR250)

GC - ZMRX (Cut down ZMR250)
Next, I soldered the pins to the flip. The PPM and LED connectors have been soldered minimally. I soon had to change that as they were interfering with the XT60.

GC - ZMRX (Cut down ZMR250)
I actually missed a few images after that.
In short, the flip goes over the PDB.
All the wires are plugged in.
I just double taped the camera to the mount and the mount slides over the front standoffs.
Screwed the top plate in, and the vtx is just held by the SMA connector at the back.
Here is the showcase.

GC - ZMRX (Cut down ZMR250)

GC - ZMRX (Cut down ZMR250)

GC - ZMRX (Cut down ZMR250)
There are a few changes I made later, which I will post in the comment.
I apologize if I missed any step.
If anyone wants the STL files,, you may contact me.
I have a couple of videos which I am in the process of uploading, will post when done.
Please share your views about the build. I would really appreciate it.
At the end, I'd like to thank RcMumbai for hosting the competition. It was really fun!


